

Have you ever looked at a photo you just took and thought, "It looked much better in real life"?
It's a common experience. Maybe the lighting feels flat, the background is distracting or the colors don't look as vibrant as you remember. While it is easy to assume the camera is to blame, professional-looking photos are rarely the result of expensive equipment alone. What makes a photo stand out is a combination of thoughtful decisions, from choosing the right light and composition to making small adjustments after the shot. In fact, many photographers would agree that a great image is created before, during and after pressing the shutter.
The good news is that you don't need years of photography experience to improve your photos. Whether you are using a DSLR, a mirrorless camera or simply your smartphone, a few practical techniques can make a noticeable difference.
This guide explains how to take professional photos, improve your technique step by step and use simple editing tools to bring out the best in each image.
What Makes a Photo Look Professional?
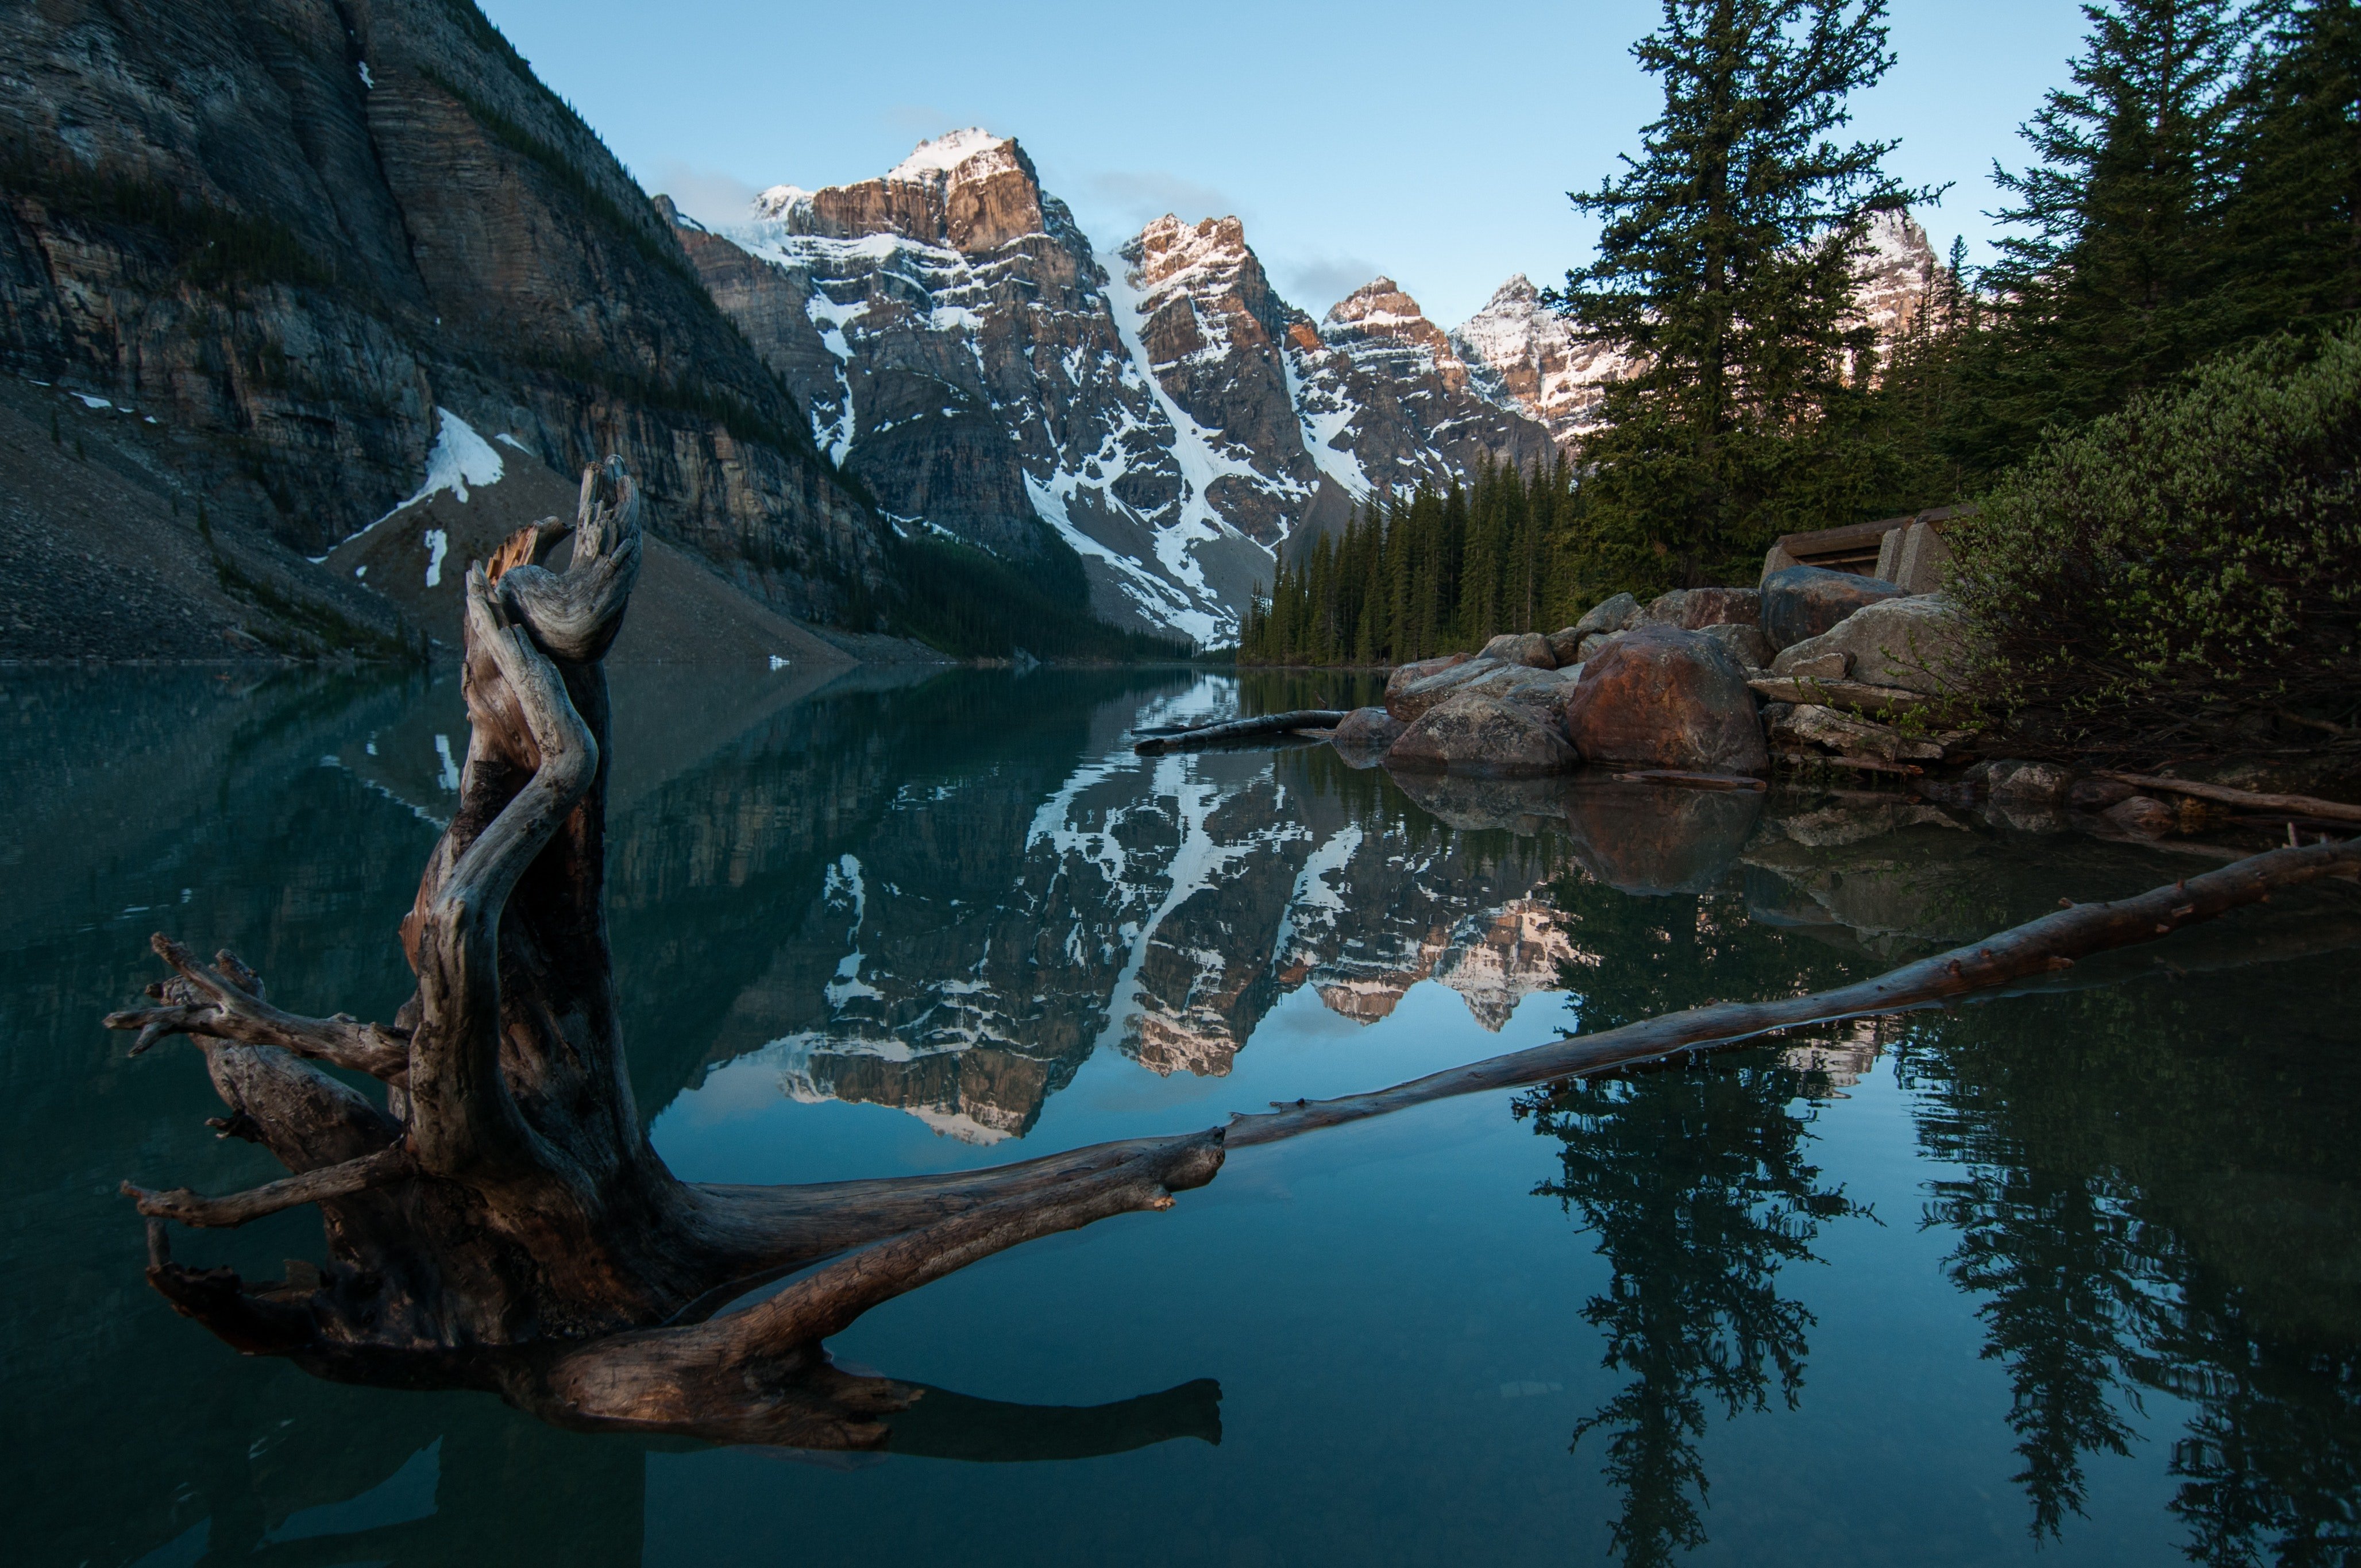
When people describe a photo as "professional," they usually respond to how the image feels rather than the camera that captured it.
Professional photos tend to share a few common characteristics. They have good lighting, a clear subject, balanced composition and colors that look natural. Most importantly, every element in the frame works together to support the story the photographer wants to tell.
So, think of professional photography as a workflow rather than a single camera technique. Strong images come from intentional decisions about lighting, composition, focus and editing, in addition to memorizing camara settings.
Here are the five elements that contribute most to a professional-looking photo.
| Elements | Descriptions |
| Good Lighting | Light shapes everything in a photograph. It determines the mood, reveals texture and draws attention to your subject. Even a simple portrait can look polished when it's captured in soft, flattering light, while poor lighting can make an otherwise interesting scene feel dull or harsh. |
| A Clear Subject | Every photo should have a focal point. Whether you're photographing a person, a product, or a landscape, viewers should immediately know where to look. If too many elements compete for attention, the image becomes harder to understand. |
| Clean Composition | Professional photos rarely feel cluttered. Instead of trying to include everything, experienced photographers simplify the frame by removing distractions and arranging visual elements carefully. A clean composition naturally guides the viewer's eye toward the subject. |
| Balanced Colors | Colors influence how a photo feels. Warm tones can create a cozy atmosphere, while cooler tones often communicate calmness or sophistication. Professional photographers also pay attention to white balance so colors appear natural and consistent. |
| Careful Editing | Even the best photos often need a few finishing touches. Editing isn't about dramatically changing reality. Instead, it's used to fine-tune exposure, improve color balance, crop distractions and make the image look closer to what the photographer actually saw. |
In other words, professional photography is not just about taking the picture and it is actually about finishing it with care.
How to Take Professional Photos?
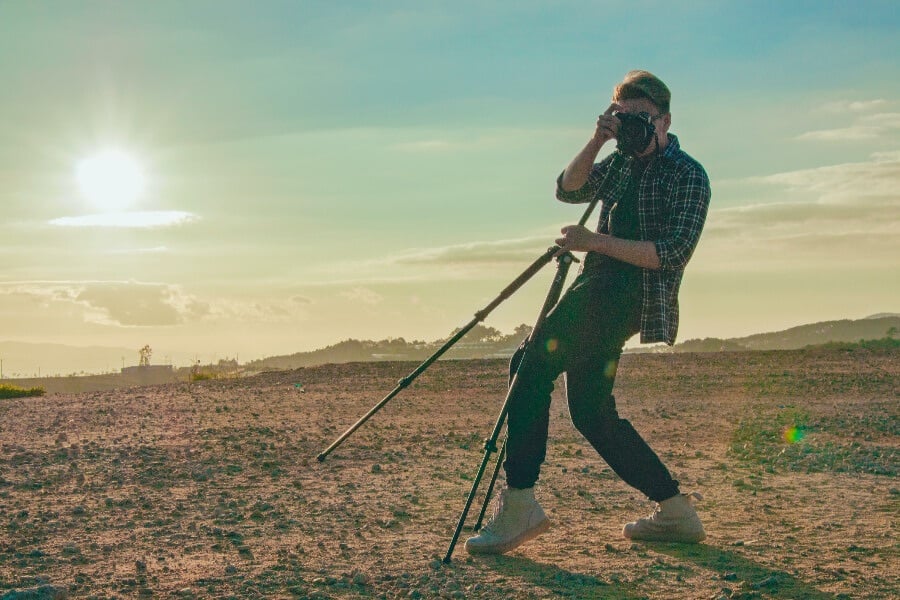
Here, we will introduce you to useful tips for capturing a professional photo.
1. Master Light Before You Touch Camera Settings
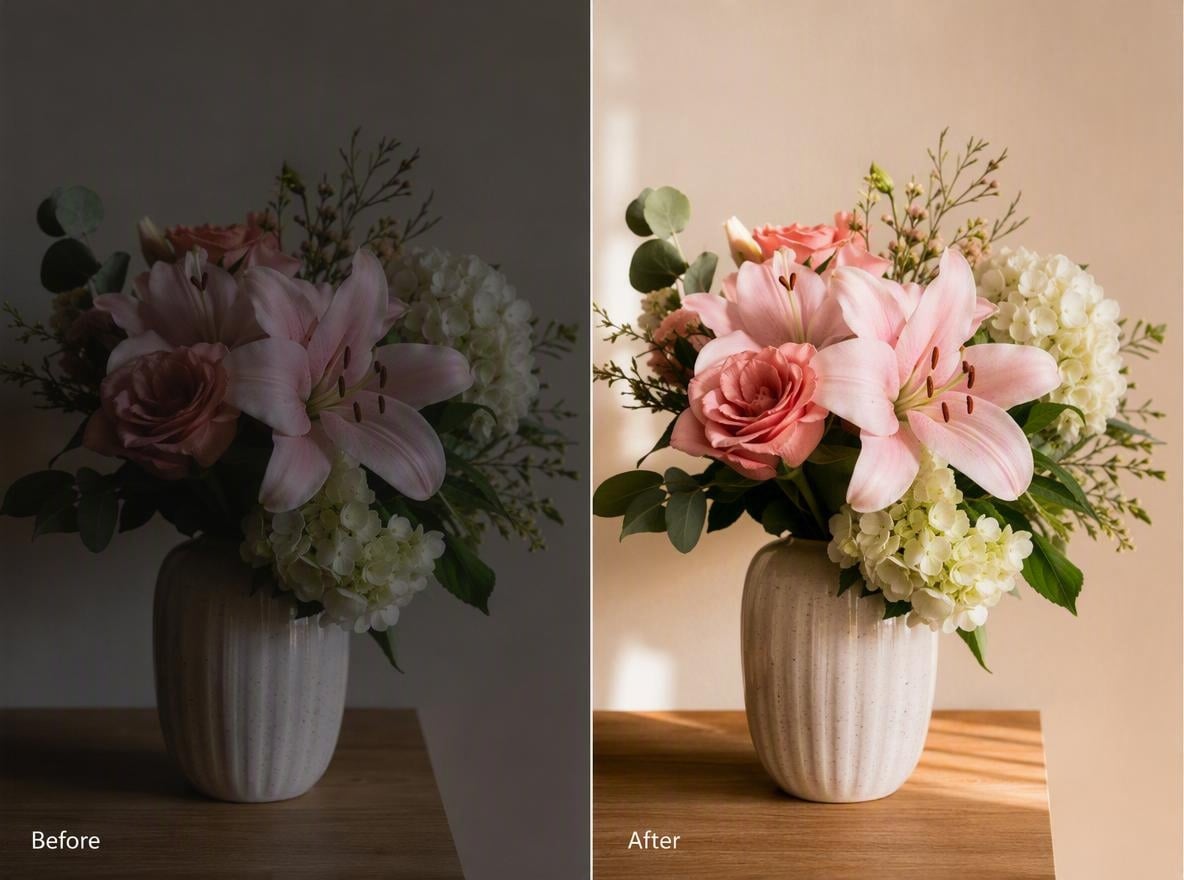
If you only improve one photography skill, make it your understanding of light. Lighting has a greater impact on image quality than camera settings or expensive lenses. A well-lit photo taken with a smartphone often looks better than a poorly lit photo captured with professional equipment. Learning to recognize good light is one of the fastest ways to improve your photography.
Use Natural Light Whenever Possible
Natural light is soft, flattering, and easy to work with. It also changes throughout the day, giving you different creative possibilities. For example, for portraits, placing your subject near a large window can produce beautiful, even lighting without needing additional equipment. If you're shooting outdoors, look for open shade or areas where the light feels soft rather than direct.
Some of the best natural lighting conditions include:
- Golden hour, shortly after sunrise or before sunset, for warm and gentle light.
- Overcast days, when clouds naturally soften harsh shadows.
- Window light, which works well for portraits, food photography, and product photos.
These lighting conditions help preserve details and create a more natural look.
Learn to Work With Different Lighting Conditions
Not every photo can be taken during perfect lighting. Understanding how different lighting conditions affect your image helps you adapt wherever you are.
| Conditions | Usage |
| Sunny Days | Bright sunlight creates strong contrast and deep shadows. While this can produce dramatic results, it may also cause squinting, blown-out highlights, or uneven exposure. Try photographing during the early morning or late afternoon whenever possible. However, you should avoid harsh midday light since is one of the most challenging lighting conditions, especially for portraits. |
| Cloudy Days | Clouds act like a giant diffuser, creating soft and even lighting. This is ideal for portraits because skin tones appear more natural and shadows are less noticeable. |
| Indoor Lighting | Indoor environments often mix different light sources, which can affect color accuracy. Whenever possible, move closer to a window instead of relying entirely on ceiling lights. |
| Night Photography | Low-light photography requires extra stability. Using a tripod or placing your camera on a stable surface helps reduce blur while keeping more image detail. |
Notes: Avoid Strong overhead light as it often creates dark shadows under the eyes, bright highlights on the forehead and high contrast that reduces detail.
Fortunately, you don't always have to wait for better weather. Simple adjustments can dramatically improve the result:
- Move into open shade.
- Turn your subject so the light falls from the side.
- Change your shooting angle to reduce harsh shadows.
- Use nearby reflective surfaces, such as light-colored walls, to soften the light naturally.
Small changes in position often have a bigger impact than changing camera settings.
2. Simplify Your Composition
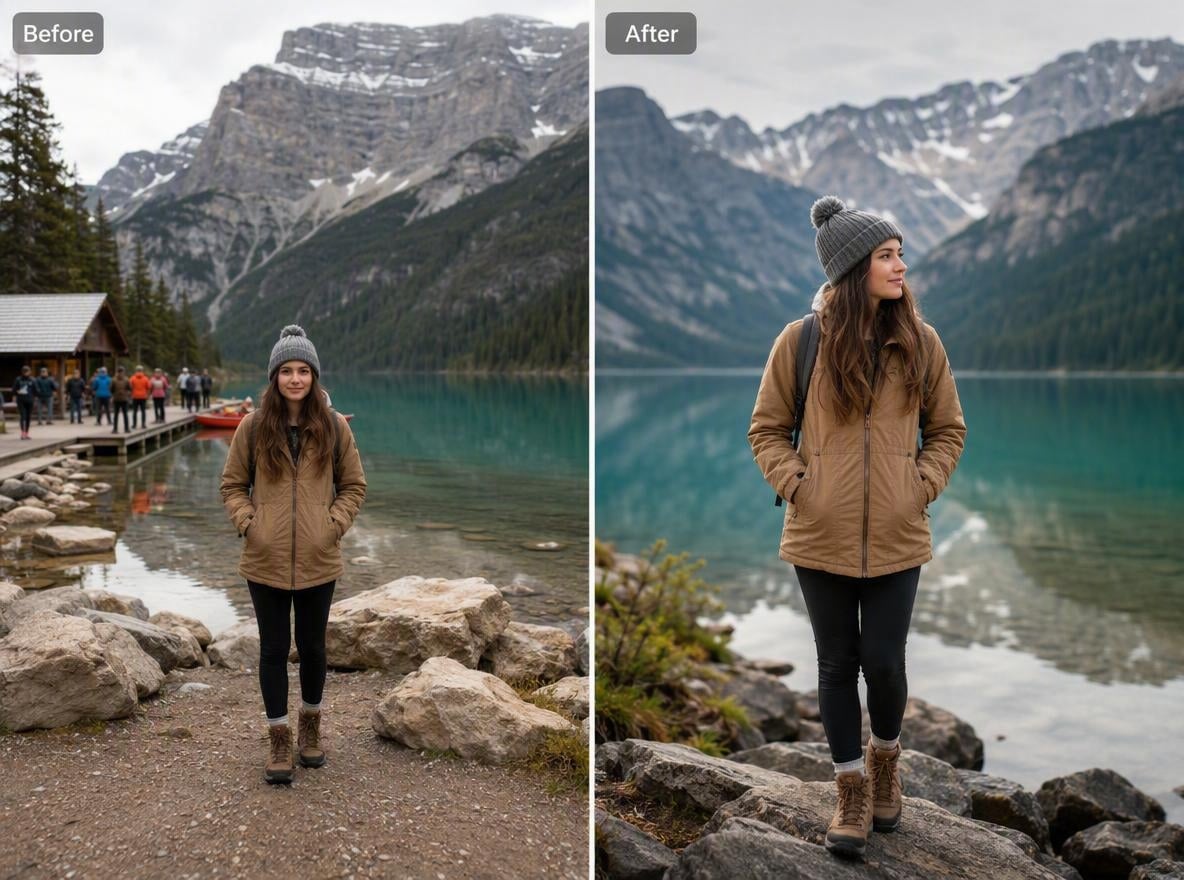
Professional photos often look effortless because they focus on what is important and leave out what is not.
One of the most common mistakes beginners make is trying to include too much in a single frame. Extra objects, busy backgrounds and unnecessary details can distract viewers from the main subject. Instead of asking "What else should I include?", try asking "What can I remove?" Simplifying your composition helps your subject stand out and makes the image easier to understand at a glance.
Use the Rule of Thirds as a Starting Point
The Rule of Thirds remains one of the easiest composition techniques to learn. Imagine dividing your frame into nine equal sections using two horizontal and two vertical lines. Placing your subject near one of the intersections usually creates a more balanced and visually pleasing composition than placing everything directly in the center.
Most smartphones and cameras allow you to display grid lines, making this technique easy to apply while shooting. Keep in mind that the Rule of Thirds is a guideline rather than a rule. Once you become more comfortable with composition, you will naturally learn when breaking it creates stronger images.
Avoid Visual Distractions
A professional-looking photo often has less going on than you might expect. Before pressing the shutter, you should take a moment to scan the edges of your frame, looking for distractions such as:
- Random people in the background
- Signs or poles behind your subject
- Bright objects that steal attention
- Unnecessary clutter
Sometimes taking a single step to the left or right is enough to create a much cleaner composition. Professional photographers often spend just as much time arranging the scene as they do taking the photo.
Guide the Viewer's Eyes
Strong composition naturally leads viewers toward your subject. There are several simple techniques that help create this effect.
| Elements | Examples |
| Leading Lines | Roads, fences, rivers, railings, and pathways naturally direct the eye through an image. Position these lines so they point toward your subject whenever possible. |
| Natural Framing | Objects, such as doorways, windows, tree branches or arches, can frame your subject and add depth to the photo. Framing also helps separate the subject from the background. |
| Negative Space | Leaving empty space around your subject can make the image feel cleaner and more intentional. Negative space doesn't mean wasted space; it gives the viewer's eyes room to rest while emphasizing the main subject. |
3. Choose the Right Background
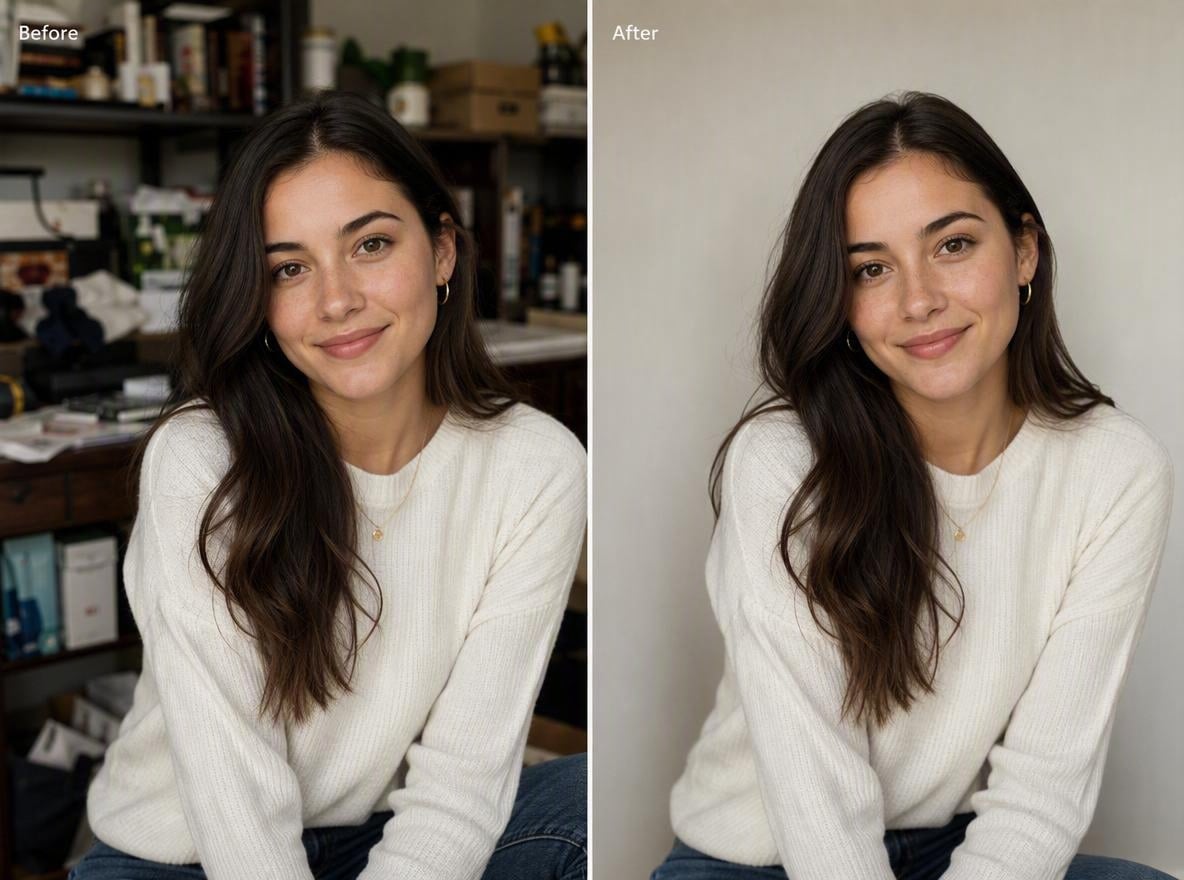
A great subject can easily lose its impact if the background is too busy.
Many photos feel unprofessional not because of poor lighting or camera quality, but due to distracting backgrounds that compete for attention. So, a clean background helps separate the subject and gives the image a more polished appearance.
Before taking your photo, you can take a few seconds to look beyond your subject. Ask yourself:
- Does anything pull attention away from the main subject?
- Are there bright colors or objects that don't belong?
- Can I change my position to create a cleaner frame?
Sometimes moving just a few steps can completely change the look of a photo.
Keep the Background Simple
Simple backgrounds make your subject easier to notice. For portraits, walls, trees or open skies often work better than crowded streets or busy interiors. For product photography, clean surfaces or neutral backdrops keep the focus on the item itself.
If you can't remove distractions, try changing your shooting angle or moving closer to your subject.
Create Separation Between Your Subject and the Background
Professional photos often have a clear sense of depth. One easy way to achieve this is by increasing the distance between your subject and the background. The farther the background is, the easier it becomes to blur it naturally, helping the subject stand out.
If your camera or phone supports Portrait Mode, it can also help create a softer background for portraits and close-up shots. Just remember that background blur works best when it supports the story rather than becoming the main effect.
4. Camera Settings That Actually Matter
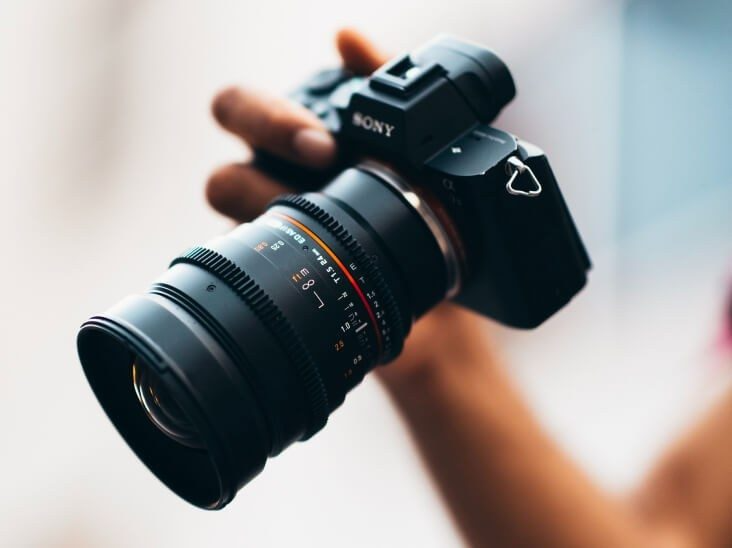
Camera settings can seem overwhelming when you're just getting started. Aperture, shutter speed, ISO, white balance. There is a lot to learn.
The good news is that you don't need to master every setting to take professional-looking photos. Instead, focus on the few adjustments that have the biggest impact on everyday photography.
Focus on Your Subject
Sharp focus immediately makes a photo feel more intentional. Before taking the picture, tap or select the area you want your camera to focus on. For portraits, the eyes should usually be the sharpest part of the image. Many cameras and smartphones allow you to lock focus before shooting, making it easier to keep your subject sharp.
Adjust Exposure When Needed
Automatic exposure works well most of the time, but it's not always perfect. If your photo looks too bright or too dark, adjust the exposure slightly before taking the shot. Most smartphones let you do this by dragging the exposure slider after tapping to focus. A small adjustment is often enough to preserve highlights and improve overall detail.
Keep Your Camera Steady
Blur is one of the quickest ways to make a photo look unprofessional. Hold your camera with both hands, lean against a stable surface, or use a tripod when shooting in low light. If you're photographing moving subjects, use a faster shutter speed whenever your camera allows it.
Capture the Highest Quality Available
Whenever possible, shoot at your camera's highest resolution. If your device supports RAW files and you're comfortable with editing afterward, RAW images retain more detail and offer greater flexibility during post-processing. For everyday photography, however, high-resolution JPEG images are usually more than enough.
Can You Take Professional Photos With a Smartphone?

Absolutely. Modern smartphones have become incredibly capable cameras. In addition to everyday users, many professional photographers use them alongside traditional cameras for travel, street photography and even commercial projects. However, the biggest difference lies in how you use the device instead of which one you choose.
Start With a Clean Lens
It's surprisingly easy to forget, but fingerprints on your phone's camera lens can make every photo look soft and hazy. A quick wipe with a microfiber cloth takes only a few seconds and can noticeably improve image clarity.
Tap to Focus and Adjust Exposure
Don't rely entirely on automatic settings. Before taking a photo, tap your subject on the screen to set focus. If the image looks too bright or too dark, adjust the exposure using your phone's built-in slider. These small adjustments give you much more control over the final result.
Use Portrait Mode Thoughtfully
Portrait Mode can help separate your subject from the background, making people, pets, or products stand out more clearly. However, it isn't always the best choice. Fine details, such as hair, transparent objects or complex edges, can sometimes appear unnatural. You should use it when it supports the composition rather than applying it to every photo.
Turn On Grid Lines
Most smartphones include an optional grid that helps you apply the Rule of Thirds and keep horizons straight. It's a simple feature, but it can greatly improve framing, especially when photographing landscapes or architecture.
Try RAW Mode if Available
Many newer smartphones now support RAW photography. RAW files preserve more image information, giving you greater flexibility when adjusting exposure, colors, and shadows later during editing. If you plan to edit your photos, shooting in RAW can provide noticeably better results. However, RAW files will take up more space in your phone, which is suitable for a phone with a large storage capacity.
Common Mistakes That Make Photos Look Amateur
Even experienced photographers don't get every shot right. The difference is that they know what to look for before pressing the shutter and how to fix small issues before they become big distractions. Here are some of the most common mistakes beginners make, along with practical ways to fix them.
| Mistakes | Examples | Quick Fix |
| Shooting in Poor Lighting | Harsh overhead sunlight may have dark shadows across the face. Very dim light can make a subject appear grainy and lack detail. | ✅Move closer to a window indoors. ✅Look for open shade outside. ✅Shoot during the golden hour whenever possible. ✅Reposition your subject so the light falls from the side instead of directly overhead. |
| Background Clutter | Unexpected or unwanted objects can make an otherwise good photo feel messy. | ✅Take a few steps to change your angle. ✅Move closer to your subject. ✅Increase the distance between the subject and the background. ✅Use Portrait Mode or a wider aperture when appropriate. |
| Crooked Horizons | A tilted horizon can immediately makes landscapes, cityscapes and architectural photos feel less polished. | ✅Turn on your camera's grid lines. ✅Use buildings or the horizon as visual references. ✅Straighten the image during editing if necessary. |
| Too Much Digital Zoom | It often reduces sharpness and detail. | ✅Walk closer to your subject. ✅Crop the image later if needed. ✅Use your phone's optical zoom lens instead of digital zoom when available. |
| Overediting | Overly saturated colors, extreme sharpening or heavy skin smoothing can quickly make an image feel artificial. | ✅A subtle edit usually ages much better than an aggressive one. |
| Forgetting the Story | A technically perfect image may be less powerful to resonate with the audience. | Before taking a picture, you should consider: ✅What is the subject? ✅Where should the viewer look first? ✅What mood am I trying to create? ✅Does every element in the frame support that idea? |
How can I make my pictures look more professional quickly?
You can start with these simple improvements:
- Find better lighting.
- Simplify the background.
- Focus on one clear subject.
- Straighten the horizon.
- Make subtle edits to exposure and color.
Even small improvements in these areas can noticeably level up your photos.
Editing Is Part of Professional Photography

One of the biggest misconceptions about professional photography is that great photos come straight out of the camera. In fact, editing has always been an important part of the creative process. Long before digital photography, photographers adjusted exposure, contrast and color in the darkroom to produce their final images.
Modern editing tools simply make that process more accessible. The goal is not about changing reality. It is to make the final image better reflect what you experienced when you took the photo.
Start With Basic Adjustments
Most photos only need a few simple improvements. Common edits include:
- Adjusting exposure to recover details in bright or dark areas.
- Correcting white balance so colors look natural.
- Increasing contrast to add depth.
- Cropping the frame to strengthen composition.
- Sharpening important details without introducing noise.
These subtle adjustments often make a much bigger difference than applying dramatic filters.
Remove Distractions
Sometimes a photo is almost perfect except for one small distraction, such as a passerby in the background, a power line across the sky or an object that pulls attention away from your subject.
Instead of abandoning the image, remove those distractions during editing. Cleaning up the frame helps viewers focus on what matters most while preserving the original story of the photo.
Enhance Portraits Naturally
Portrait editing works best when it feels invisible. Rather than dramatically changing facial features, small refinements, such as balancing skin tones, reducing temporary blemishes, brightening the eyes or softening harsh shadows can create a polished yet natural result. The best portrait edits preserve the person's unique appearance instead of making everyone look the same.
How An AI Photo Editor Can Speed Up Your Workflow?
As is discussed above, capturing a strong image is only the first part of the process. Editing can help correct exposure, balance color, refine composition and remove small distractions. An AI photo editor can speed up these routine adjustments while leaving the final creative decisions in your hands.
Fotor has everything for you to polish your photos to make them look professional. even if you have no professional editing skills.
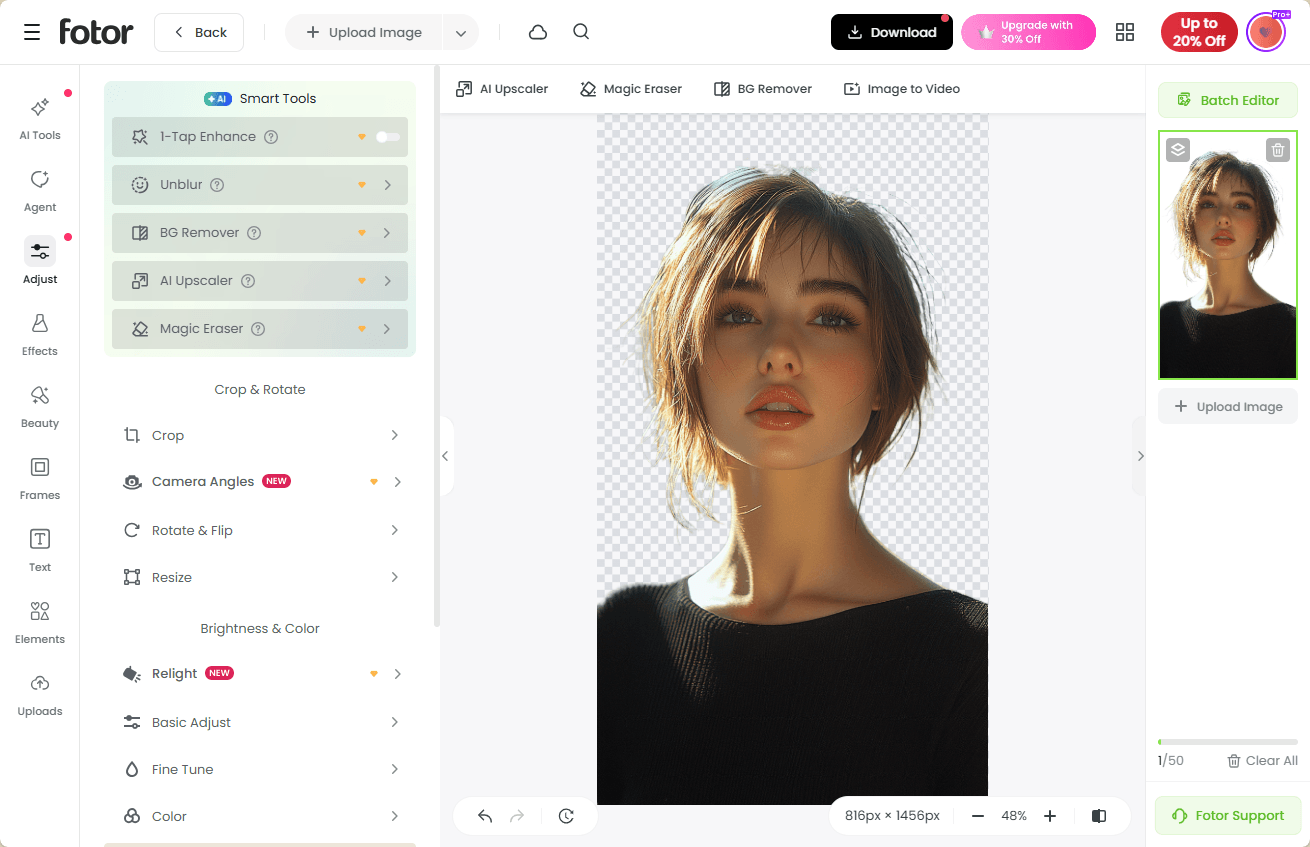
For example, when you find the lighting is not proper, Fotor could correct color, improve contrast, fine-tune the hue and more. If you prefer quick and automatic image quality enhancement, our AI image enhancer can help you realize this goal.
When it comes to composition, Fotor offers an image cropper to cut the unwanted content out of your photo and a powerful object remover to get rid of any distracting clutter from it without blur and quality loss, including photobombers, pedestrians, text, signs and more.
And you must find it hard to go to different locations to take professional pictures. This way is both time and energy-consuming. Don’t worry, Fotor’s Background Remover could help you remove the original setting and change a background you wish to match the professional photos.
What’s more, there are a lot of tools for you to make a photo look more professional and natural. For instance, to conveniently change image perspective, Fotor's photo angle changer helps you achieve this goal naturally without the need for reshoot.
However, while AI tools can reduce the time required for common edits, complex edges, fine hair, reflections and detailed backgrounds should still be reviewed carefully.
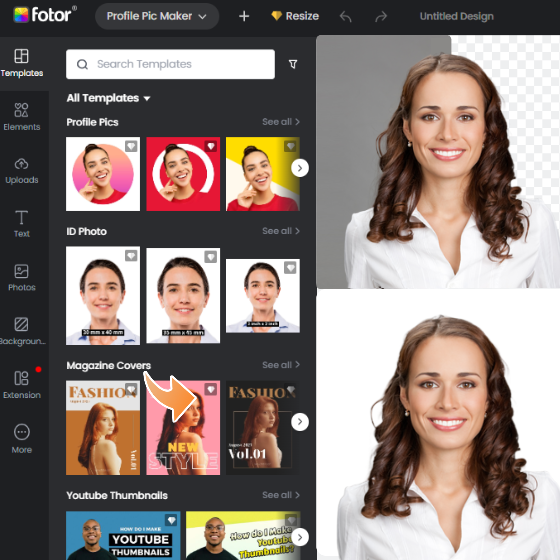
Powerful AI-driven editing tools like background remover, AI enlarger, object remover, one-tap skin retouch, AI art effects, etc.
100,000+ ready-to-use templates and creative content for graphic design and photo collages.
Millions of HD stock photos for personal and commercial use.
From Capture to a Professional Photo: A Simple Workflow
Creating professional-looking photos isn't about following one secret technique. It's a process where every step builds on the previous one. A simple workflow might look like this:
Step 1: Plan Your Shot
Think about your subject, the story you want to tell and the best lighting available.
Step 2: Compose Carefully
Remove distractions, choose a clean background and position your subject intentionally.
Step 3: Capture Multiple Photos
Take several versions with slightly different angles, compositions or exposure settings, which gives you more options to choose from later.
Step 4: Select the Strongest Image
Instead of editing every photo, choose the one with the best expression, lighting and composition.
Step 5: Refine the Image
Make thoughtful adjustments to exposure, colors, crop and distracting elements. AI-powered editing tools can also help streamline routine edits while keeping your creative vision in control.
Step 6: Export for Your Platform
Resize and optimize your image for where it will be shared, whether that's Instagram, a website, an online store or a printed portfolio.
Conclusion
How to take professional photos? Now, you know professional-looking photos are created through a series of intentional choices, from finding the right light and composing the frame to refining the image during editing.
As you practice, you'll start noticing details that once went unnoticed: how the direction of light changes a portrait, how a cleaner background strengthens the subject or how a small crop can improve an entire composition. The more intentional you become at each stage of the process, the more consistently you will create images that feel polished and engaging.
Finally, don't think of editing as an afterthought. It is the finishing step that helps bring your creative vision to life. If you want to streamline routine edits, Fotor's AI Photo Editor can help you adjust lighting, clean up distractions and refine your images while keeping you in control of the final result.