How to Photograph People: The Ultimate Portrait Photography Tutorial
Summary: Portrait photography tutorial can teach you how to take excellent people photography easily. Focusing on those portrait photography tutorial many times, you will turn to be professional photographers from amateur quickly.
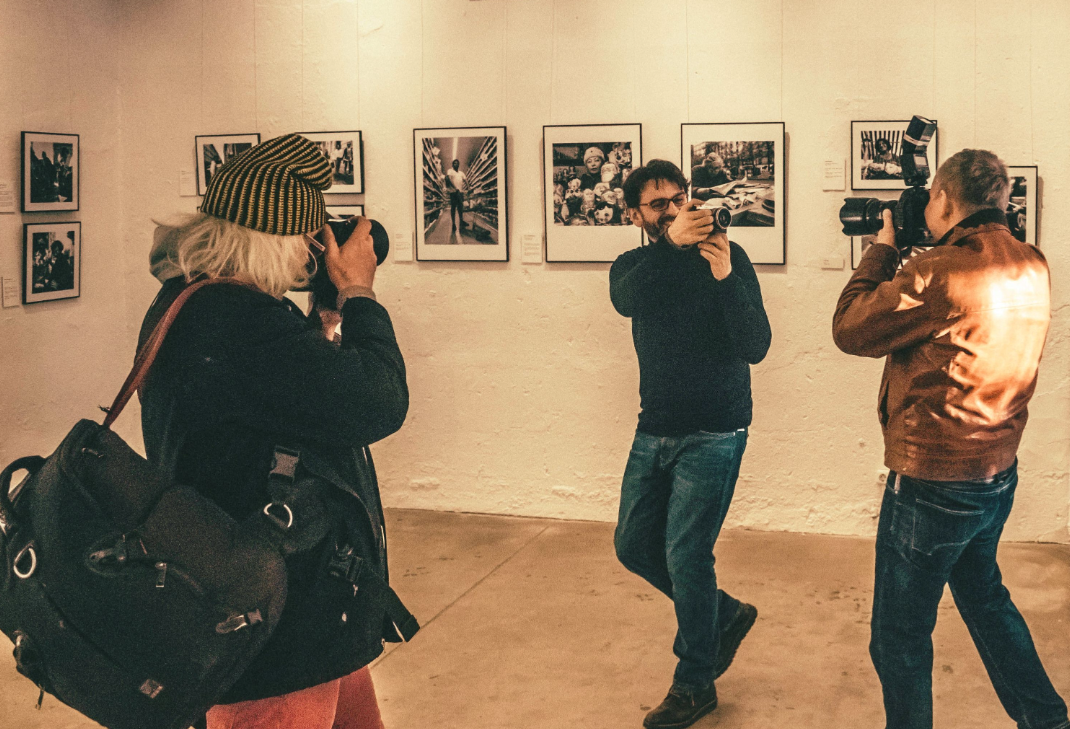
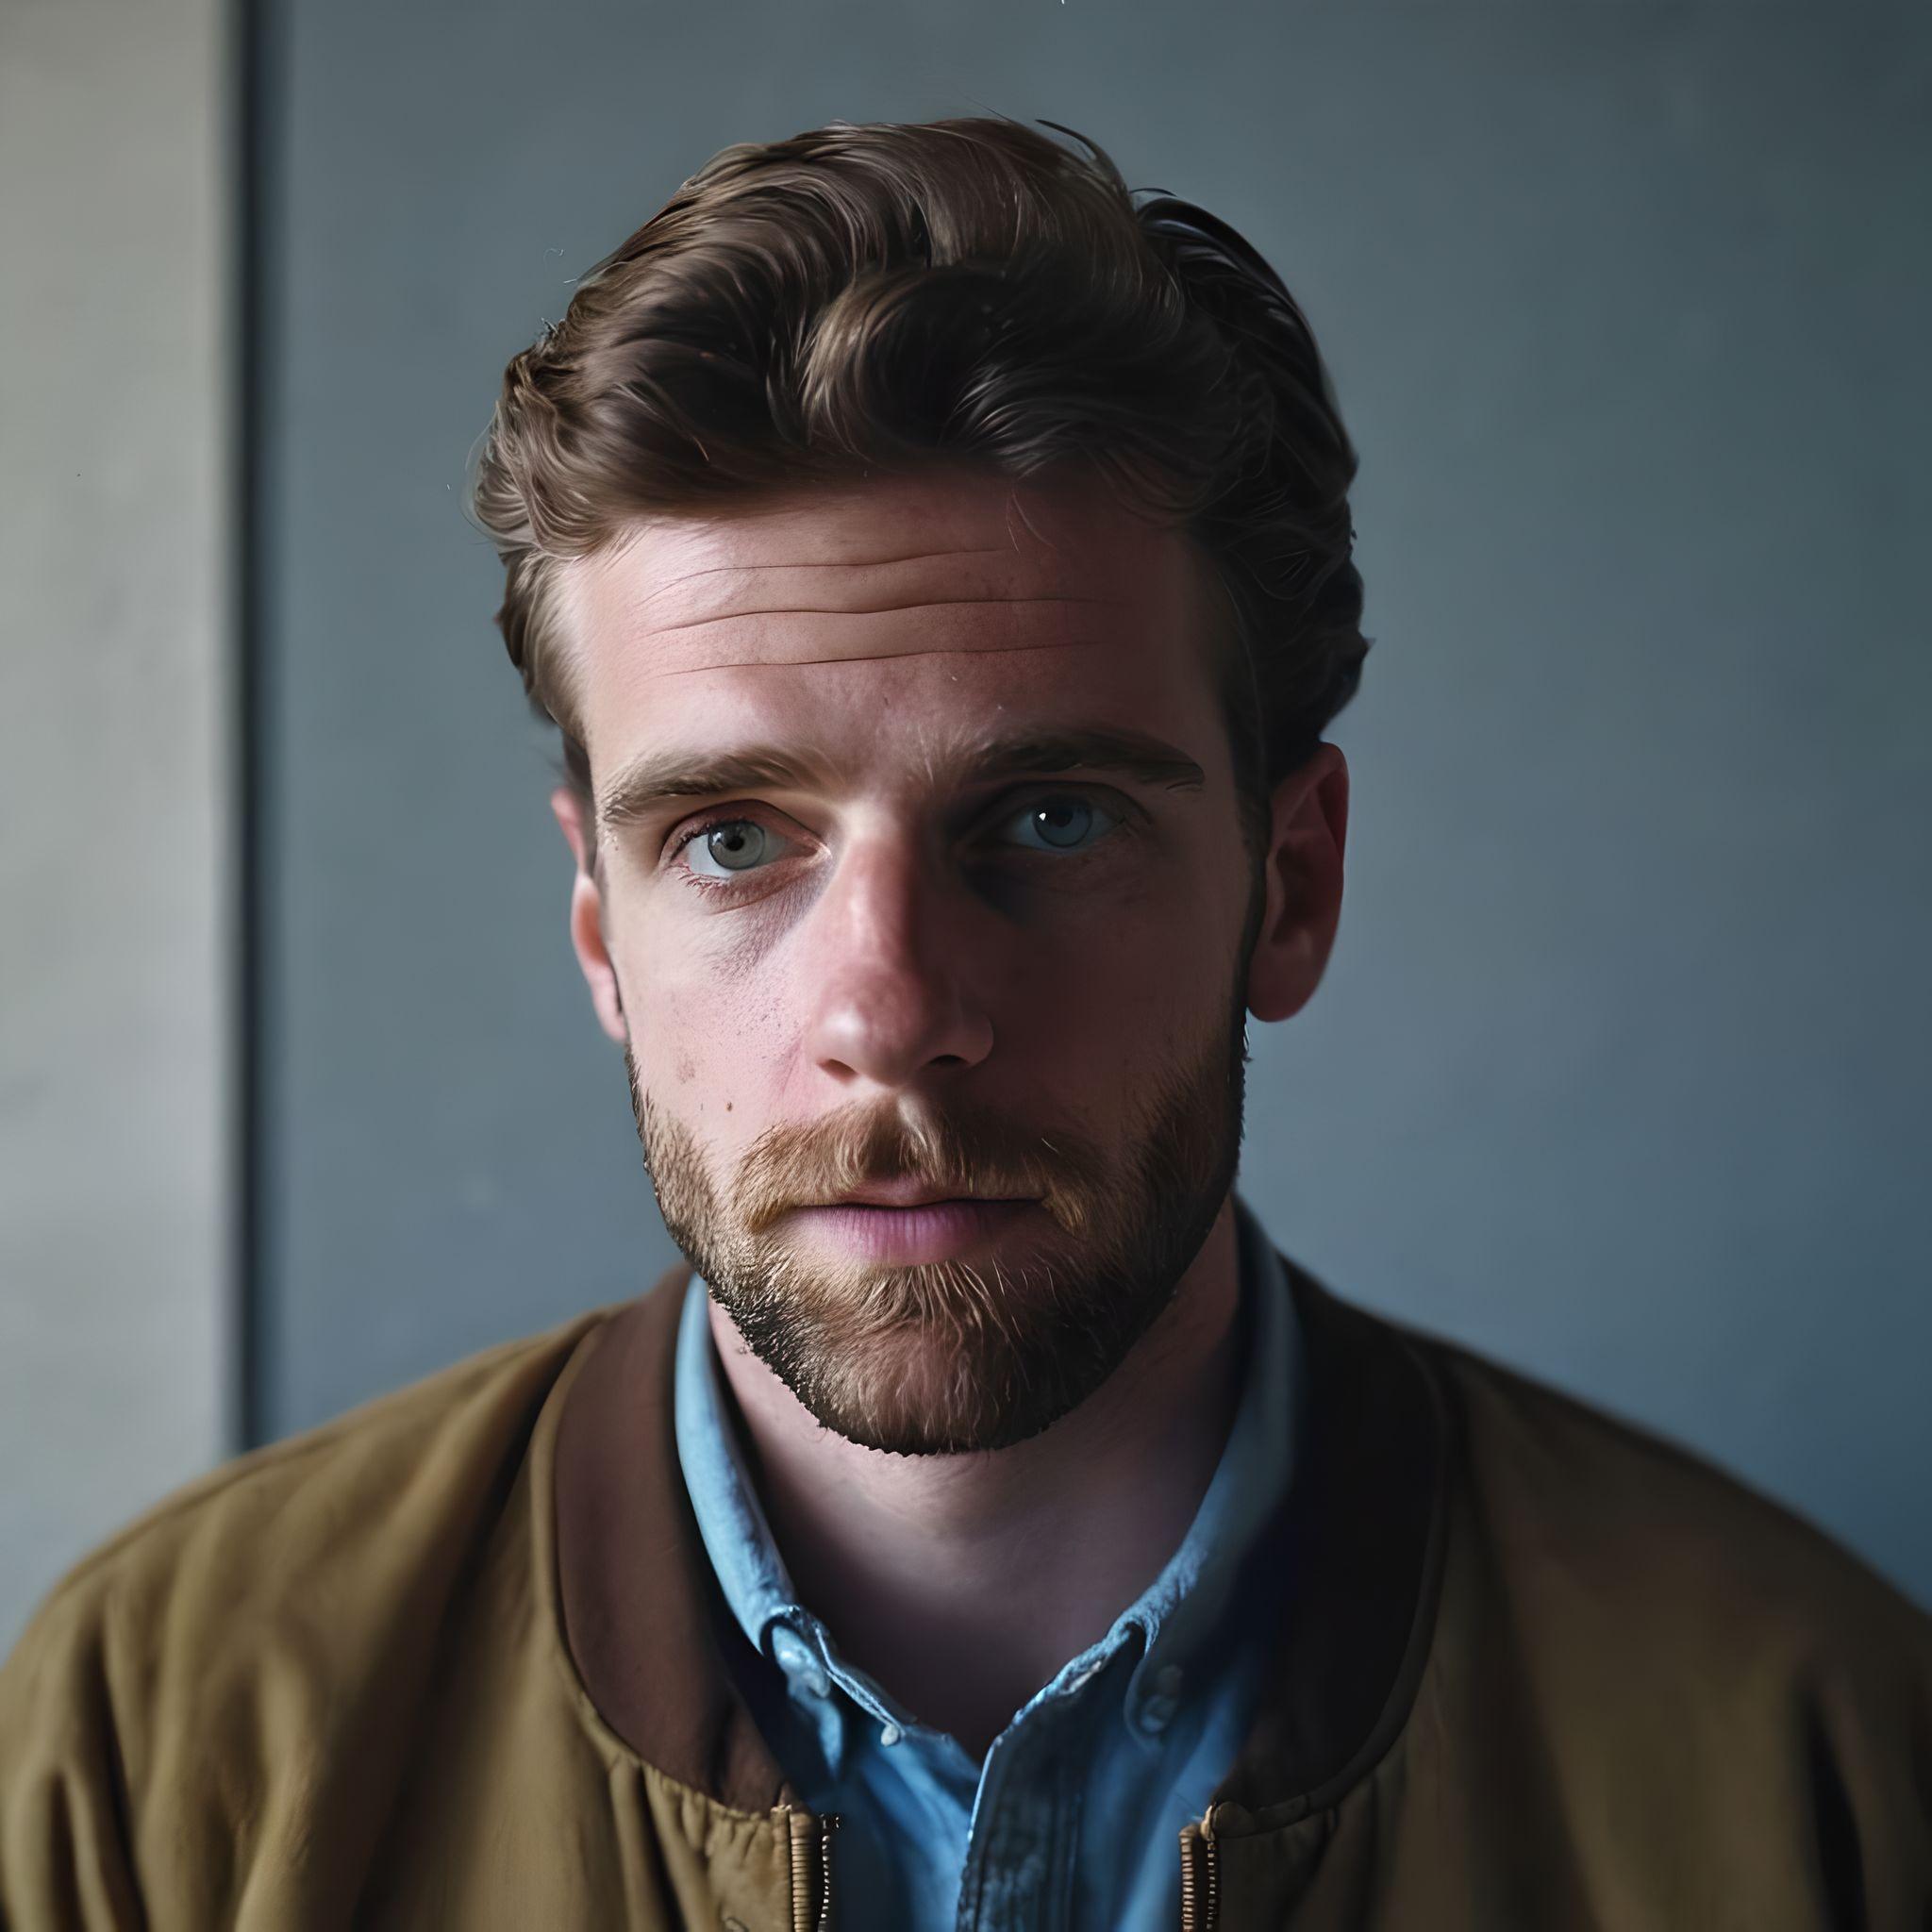
Photo from Pexels
If there’s one thing people love seeing in photographs, it’s other people! As humans ourselves, there’s plenty of psychological and neurological factors at play when we look at another person — far more than other subjects, no matter how beautiful a sunset is. By knowing how aspects of human subjects affect your viewers, particularly for portrait photography, a good photographer is able to not only incorporate them into their work but to build entire compositions and themes around them.
In this article, we’ll run through the portrait photography basics of how composition, facial expressions and posing affect photography, so that you can improve your portraits and make them seem a little more “human” through those portrait photography tutorials.
Place Eyes at the “Thirds” Intersections
Eyes are the natural focal point whenever we look at other humans (or at animals, for that matter). Maybe it’s because of the dark pupil and iris contrast with the white sclera behind them, maybe it’s because it’s an empty space in an otherwise busy face, or maybe it’s a biological trait, like so many other of the features on this list. So eyes are the most important part of portrait photography tutorial.
Regardless of why, it’s a fact all the same that if there’s a person in your photograph, the viewer will naturally be attracted to their eyes. As a photographer, if you’re not conscious of where the eyes are placed in a composition, they’ll end of competing with other focal points and neutralize both.
A better strategy is to place one of your subject’s eyes in the photograph’s native focal point to enhance the effect, rather than water it down.
You probably already know about the Rule of Thirds, as we mentioned before in our compositional tips. If you divide a photo into thirds vertically, and then horizontally, where the lines intersect are the inherent focal points and where you should place your most interesting subjects. With people, the most interesting subject is the eye, so placing them at these intersection points creates a stronger composition.

Sometimes, though, you may want to optimize other areas or maybe try a more artistic composition, in which case placing the eyes anywhere along one of the “Thirds” borders is the next best option.
Of course, for wide angles, the eyes appear smaller and so lose some of their impacts. In this case, you can find more interesting subjects to use for the “Thirds” intersections — anywhere in the person’s head will suffice if the angle is far back enough. To help you determine whether to accent the eyes or not, if the camera is close enough to see the whites of a person’s eye, then you should place them in main focal areas.

Finding these focal areas can be hard to gauge in the field, especially if you’re new to photography. Don’t worry — you can always correct the composition with online photo editing software afterward. With Fotor or other photo editors, you can use guidelines to rearrange your photo and crop them for a flawless composition.
Pay Attention to Where Subject’s Eye is Looking
While we’re on the topic of eyes, another major consideration is where your subject is looking. Humans have a “herd mentality” where, for our safety, we’re instinctually curious about what other people are doing. If someone is looking somewhere, in real life or a photo, we automatically follow their eyeline to see what they see.
Photographers can use this phenomenon to add emphasis to other areas of the shot. Where your subject is looking essentially acts the same as a leading line: the viewer will follow the subject’s eyeline, so whatever is in its path receives extra attention. If multiple people in your shot are looking at the same thing, that heightens the effect further.

Photo from Pexels
But what if the person is looking towards the camera or at something off the frame, as is often the case. Photographers can play with these techniques, too, to imbue the shot with additional themes and emotional flourishes:
- Subject looks at the camera: This adds a sense of honesty, openness, and a direct connection to the viewer. It’s a favorite of professional photographs like headshots or company bios, but also works well in artistic photography that emphasizes the individual.
- Subject looks off frame: This adds a sense of mystery to the shot and makes viewers curious about something they can’t have the answer to. The appeal of the mysterious is why album covers often feature the musicians looking off frame in the distance.
- Subject looks down or has eyes closed: This adds a sense of intimacy, as if the viewer catches them unaware or finds them asleep. It creates a forceful effect, but also weakens the focal power of the eye, so use it sparingly.
Unlike where the eye lands in the composition, where the subject is looking cannot be changed afterwards with a photo editor. Pay attention to it during a shoot so you can instruct your subject where to look.
Center or on a Vertical
In portrait photography, there are merits to both placing the subject in the center and placing them along one of the “Thirds” verticals. The best choice depends on the kind of photograph you want.
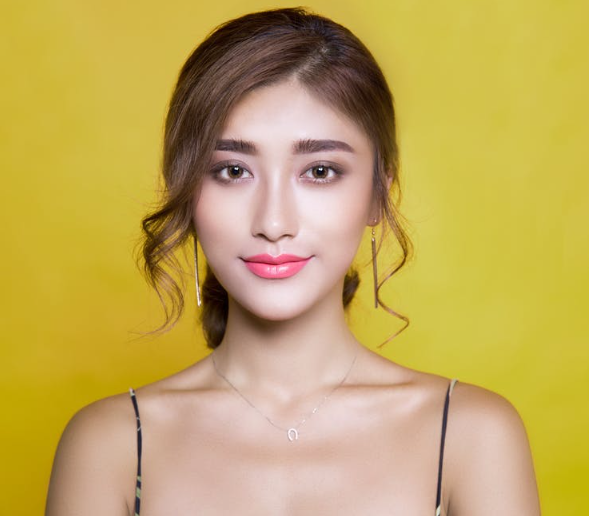
Photo from Pexels
For formal shots like website profile pictures, headshots, or official documents, centering the people works best. The center of an image is another focal point (though not as strong as the “Thirds” lines), and if the background is blank or uninspiring — common for formal shots — then a centered subject creates a more dynamic and stimulating visual.
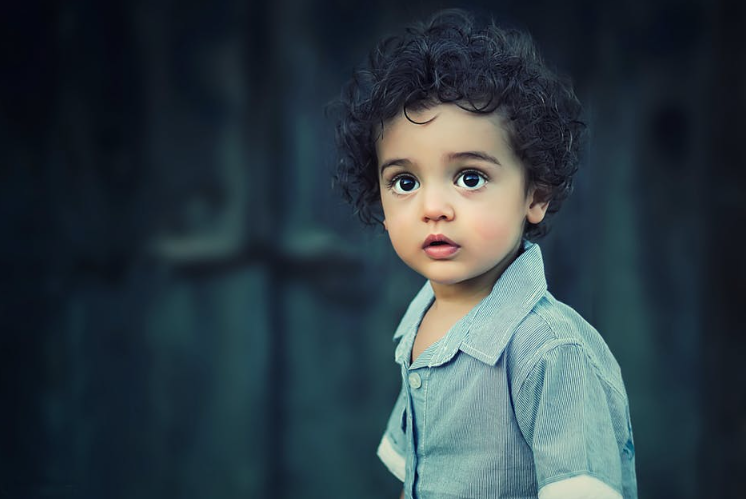
Photo from Pexels
However, if you want a more artistic and creative portrait, or if you want to highlight the background alongside the person, place your subject along either the left or right vertical line.
If you have a good background, you can pull back the shot and have the person’s body along the vertical. If not, though, try getting closer so that their body fills most of the frame. Don’t forget you can place their outermost eye on the vertical and have the rest of their face and upper body fill in the shot. As we mentioned in our tips to simplify photo composition, filling the frame creates energetic and tight portraits.
But no matter which of the two choices above you choose, you always want to place your subject’s eyes along one of the “Thirds” horizontals, typically the top one. Not only does placing the eyes a third down in the frame create a stronger composition, it also avoids a common mistake in portrait photography: placing the head completely in the center leaves too much empty space at the top.
Add Space In Front or Behind the Subject for Action Shots
Action photography and portrait photography both have different sets of guidelines, but what if you want an action-packed portrait? What if you want your action shot to seem a little more personable?
To get a shot that captures both the action and the person performing it, you again want to place the subject on either the left or right vertical. However, because it’s an action shot, it’s recommended that your use a wide angle, usually full body. After all, most action shots showcase feats involving the whole body.
Which vertical you use depends on which aspect you want to give the most emphasis to. More precisely, the photographer chooses how much space they want in front of the subject. We’ll use left-to-right action for simplicity.

Photo from Pexels
If you place the subject on the left vertical, they have ⅔ of the frame in front of them. This accents the person. The viewer notices the subject of the photograph first and then scans the space beyond afterward, prioritizing the person taking the action over the action itself.

Photo from Pexels
If you place the subject on the right vertical, they have ⅓ of the frame in front of them. This accents the action. The viewer scans most of the picture before landing on the subject, prioritizing the other elements, particularly what else is happening in the scene. Moreover, as in the example above, other subjects fill the frame before the viewer gets to the main subject — such as the opponent tackling our subject. This emphasizes the entire situation rather than the individual.
Mirror Neurons and Empathy
Happy faces create happy photos, sad faces create sad photos, and so on. You probably know this already, even if you don’t have any prior photography experience, but what you may not know is that this is a truth well-documented by science.
Mirror neurons are brain cells in higher mammals that duplicate a behavior that they observe. Seeing a happy person triggers your mirror neurons to make you a little happier. It also goes deeper than emotion: mirror neurons are the reason you yawn when you see someone else yawning, or start laughing when your friend is laughing.
For photographers, this can be a useful tool for creating the atmosphere they want in their photos. If you want to add a theme of anger in their photograph, you can have your subjects use angry facial expressions. This can also be used to instill contrast or drama — if one person is smiling while the other is angry, that creates a more dramatic image and improves the storytelling aspects of photography.

Photo from Pexels
Moreover, knowing how mirror neurons works also helps photographers avoid accidental mistakes. For example, if you want to take a happy picture about motherhood, you shouldn’t use a crying baby; it’s better to wait until the baby is smiling to maximize the positivity of the picture.
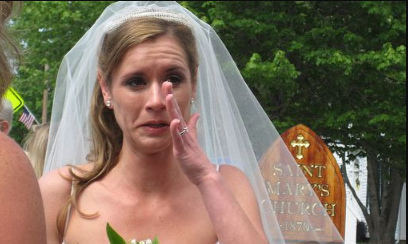
Photo from Flickr
You should also be careful about confusing facial expressions. It’s common for people to cry at a wedding, but if a picture is taken at the wrong angle or the wrong time, it could look like the bride regrets her decision!
The Squinch
If you ask the subject themselves what their biggest concern is, more often than not they’ll respond about how good they look. Showing your subject at their best serves a variety of purposes, whether for glamour photography, professional photography, or photos for your scrapbook. But even professional models can sometimes have trouble making the right face.
To solve this problem, photographer Peter Hurley invented the perfect shortcut to an attractive and confident facial pose that even amateur models can master. He calls it the “squinch,” and it’s a simple, multi-purpose eye gesture that makes any subject camera-ready. To do it, just:
- Pull up your lower eyelid
- Slightly lower your top eyelid
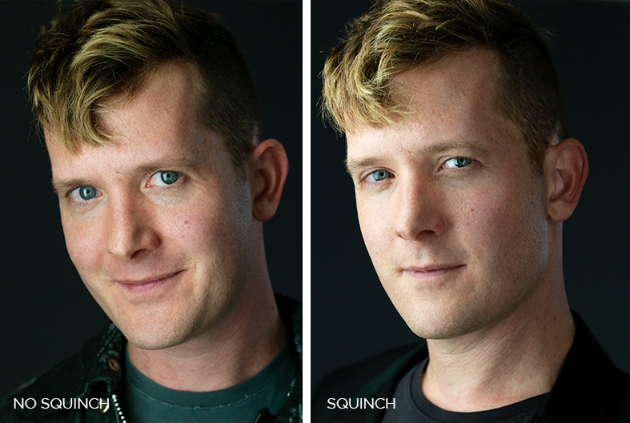
That’s it. This effortless pose works equally well with smiling or serious expressions, and tends to make the model feel more comfortable as well. Hurley’s thinking is that wide-open eyes are a sign of nervousness and fear, while fully squinting is just unattractive. So in between the two is the squinch, giving your subject a confident appearance of narrowed eyes that looks natural.
Portrait Retouching
The more you learn about photography, the more your notice your mistakes! Not even DaVinci himself got all his paintings right the first time.
It’s practically impossible to get everything perfect in the exact moment your shutter clicks, and even the best photographers rely on online photo editing tools to revise their work before it’s complete. In the case of people photography, that means portrait retouching.
Unless you’re doing a strictly naturalistic shoot, both your models and your viewers are expecting some photo editing. Online software like Fotor comes equipped with tools for anti-aging, removing skin blemishes, and even resizing, all at the push of a button. There’re basic photo manipulation tools like red-eye remover or more advanced techniques like teeth whitening.

A lot of people shy away from photo editing software because they think it’s too complicated or difficult to learn. Fotor’s user-friendly interface and under-a-minute tutorials make it easy to use, not to mention fast. If you want to learn some instant techniques to flatten wrinkles, reshape jawlines, or “brush” up facial coloring, read our tutorials of portrait retouching now.
Some problems you can fix in the field, maybe by adjusting your lens or hiding a blemish behind a prop. But for all the others, you’re going to need a reliable photo editor like Fotor.
Conclusion
As we mentioned above, when shooting portrait photos, we can try to use the “thirds” rule of the portrait photography tutorial to place the eyes of the models in the conspicuous places in the picture. In addition, the effect of a model’s looking at a lens or not looking at a lens is quite different; whether the location of a character in the picture is in the center or the edge, will give the audience very different viewing feelings. Finally, we talked about the different effects of different facial expressions on portrait photography. In short, as a portrait photographer, the basic way to improve your shooting skills is to shoot and try more, understand and master these methods.