Blur Image Online for Free
With Fotor’s free online blur photo editor, you can effortlessly blur images, photo backgrounds and any specific parts of a picture in just seconds. Apply a blur effect to bring focus to the subject, reduce visual distraction, blur face, or hide sensitive information.
Drag image here or click to upload
Drag image here or click to upload


800M+
Users Worldwide
4.5 ★
on Capterra
3-Sec
Automatic Blur
How to Blur a Picture?
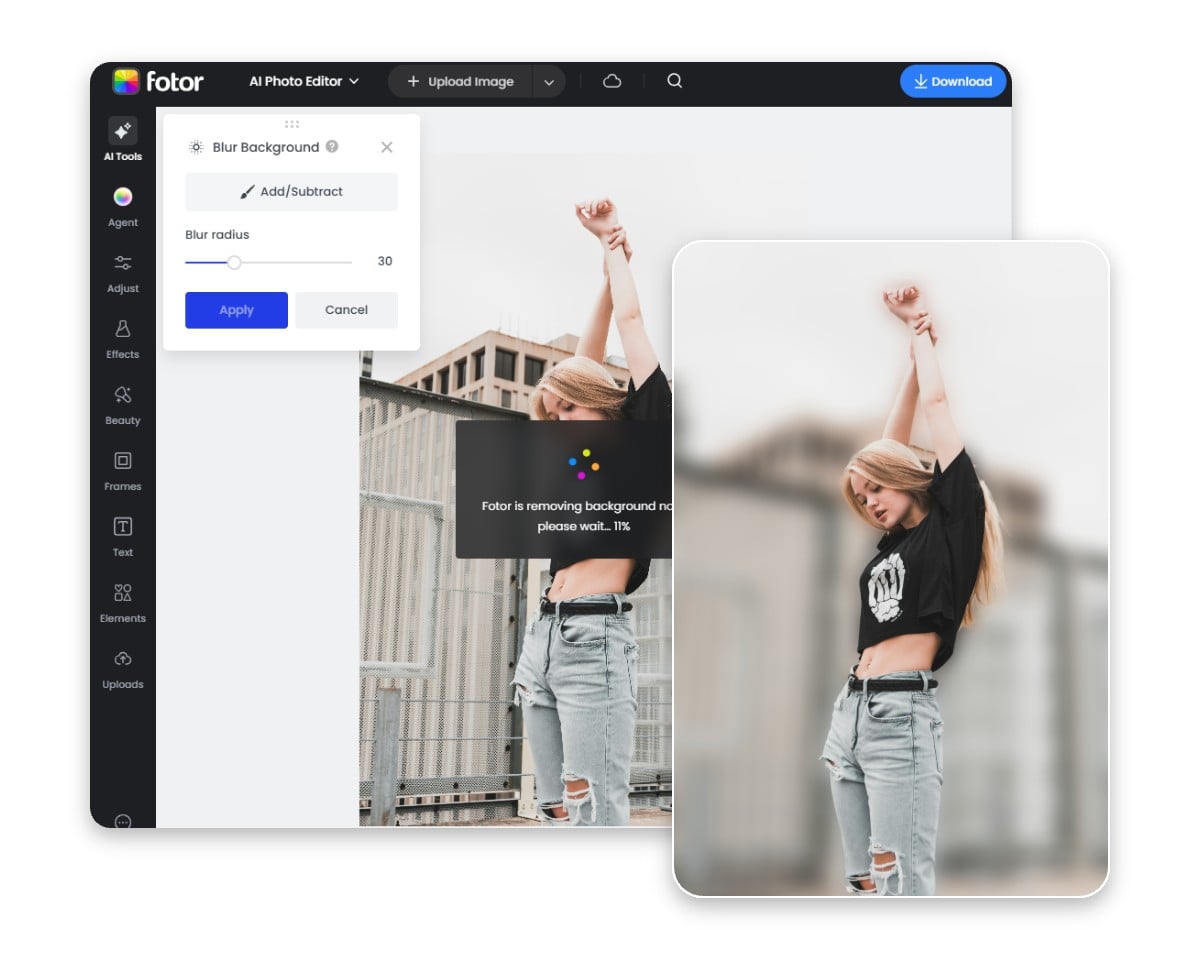
Upload Your Photo
Drag and drop your image or click to upload it to Fotor’s blur photo editor.
Customize the Blurry Area
Apply & Download
One-Click, AI-Powered Blur Tool
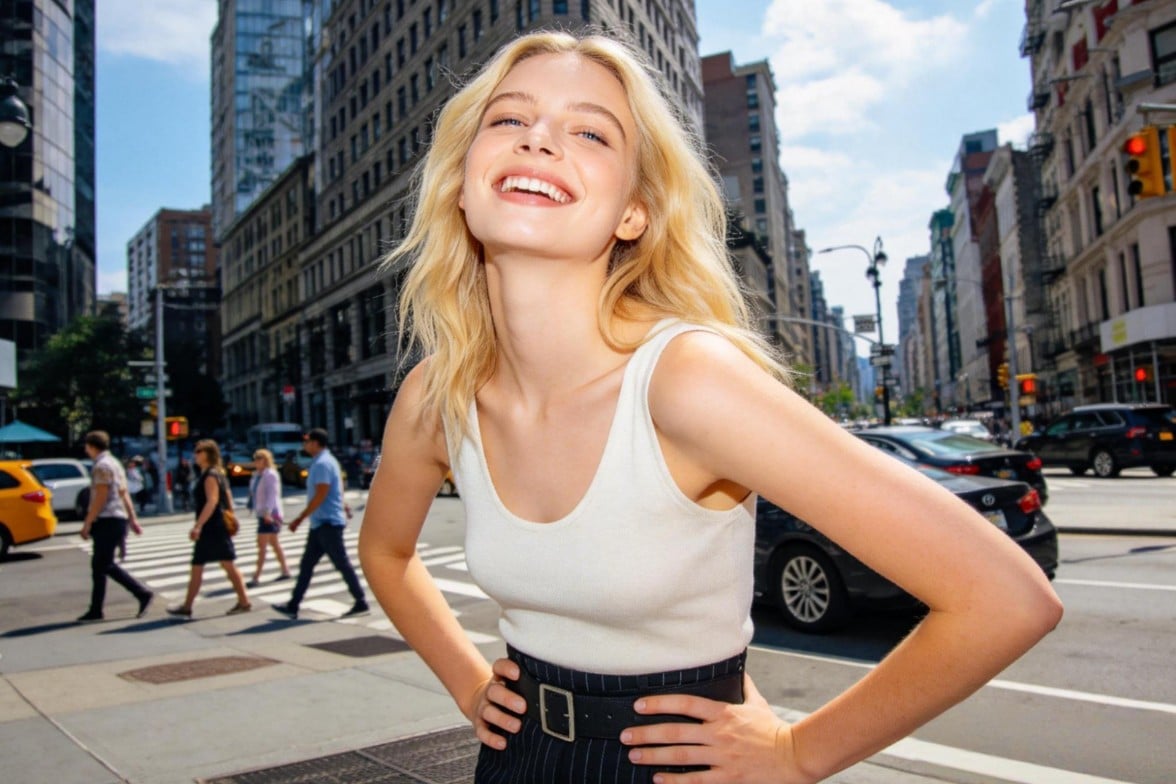
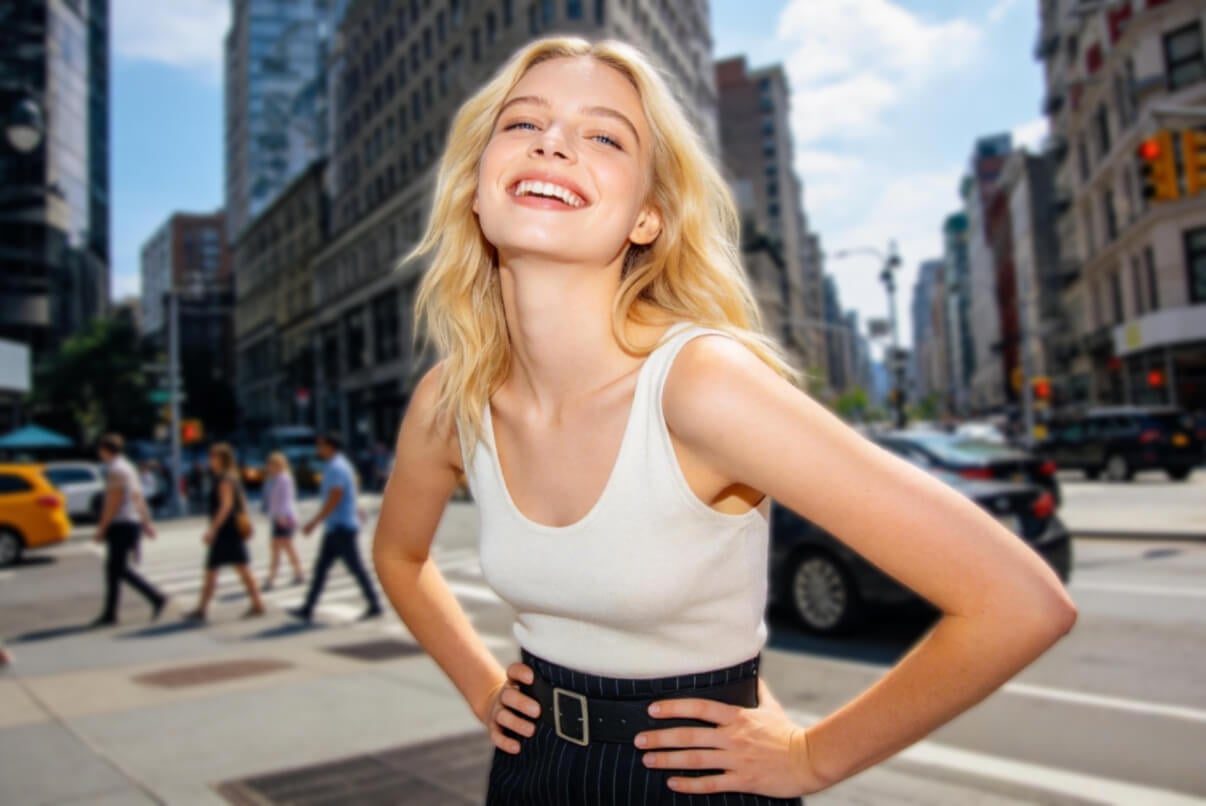
You no longer have to blur images manually. Powered by an advanced AI model, Fotor’s editor can automatically blur pictures for you. After you upload a photo, the AI intelligently recognizes the subject and applies a realistic blur effect to the rest of the image.
Our blur tool can precisely detect and preserve the edge of the subject, even if it's a string of hair. The result is a natural-looking blurred photo, as if it were captured with a professional DSLR camera.

Customize Every Detail of Your Image Blur
Fotor’s free online blur editor is fully customizable, letting you adjust both the blurry area and the intensity. Use the brush to mark specific areas you want to blur, whether you're looking to highlight multiple subjects or censor private information like faces and license plates. You can also drag the slider to easily switch between a subtle soft focus and a more striking, deep blur effect.
Various Use Cases of Photo Blur Editor
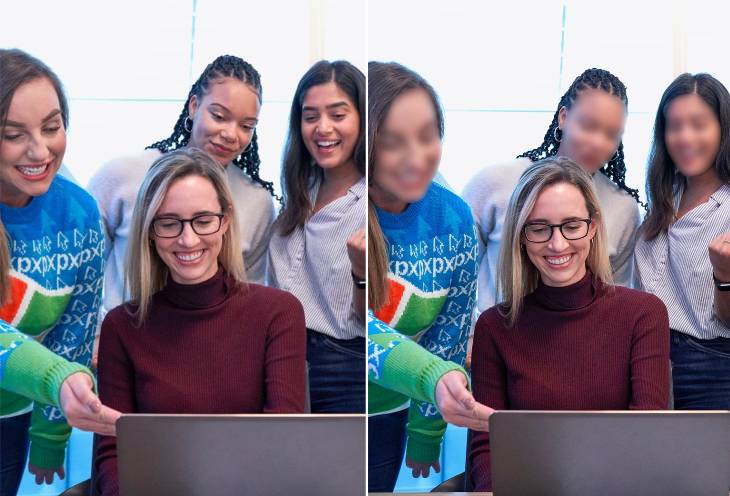
Blur Face
Blur faces in photos to safeguard privacy before sharing or publishing them. This is especially useful for group snapshots or street photography where you need to mask the faces of passersby.

Hide Sensitive Information
Remember to blur photos that contain sensitive information, such as home addresses, phone numbers, or license plate numbers, to ensure your personal data remains private.
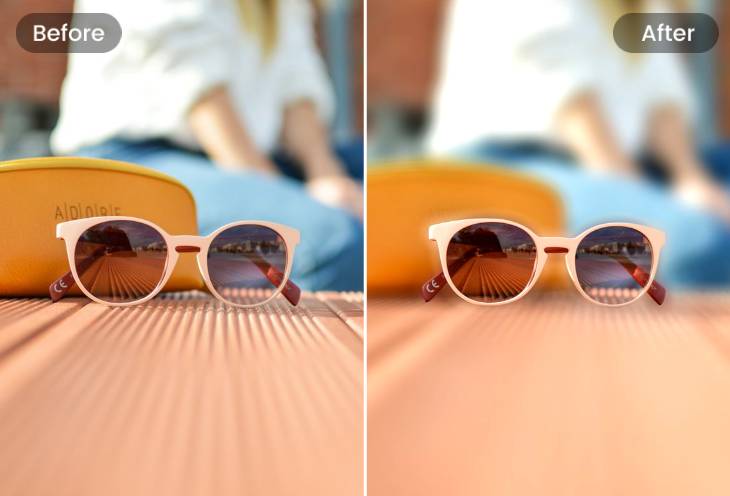
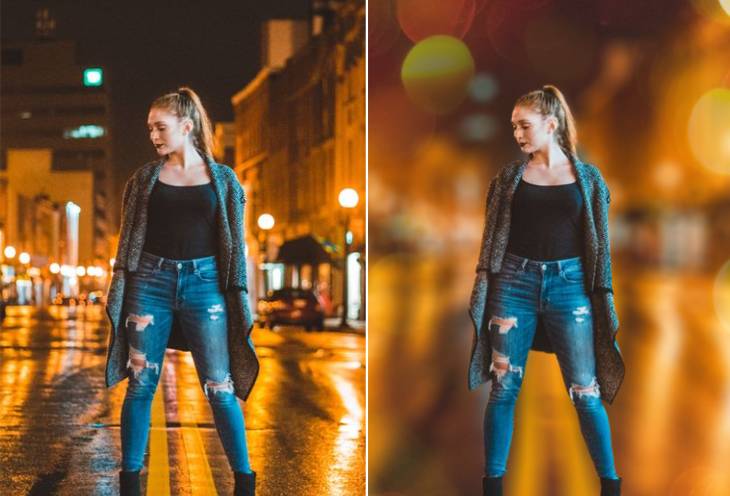
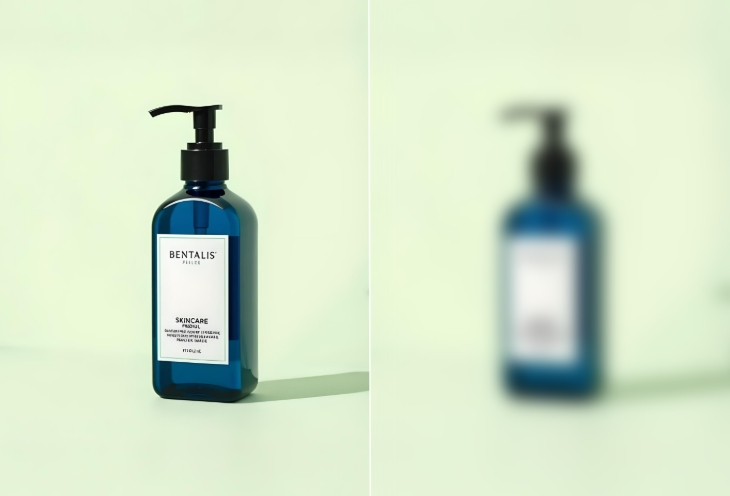
Bring Focus to the Subject
Bring your subject into focus with Fotor by blurring distracting backgrounds. This is the ideal way to elevate portraits or product photos, giving them a professional look.
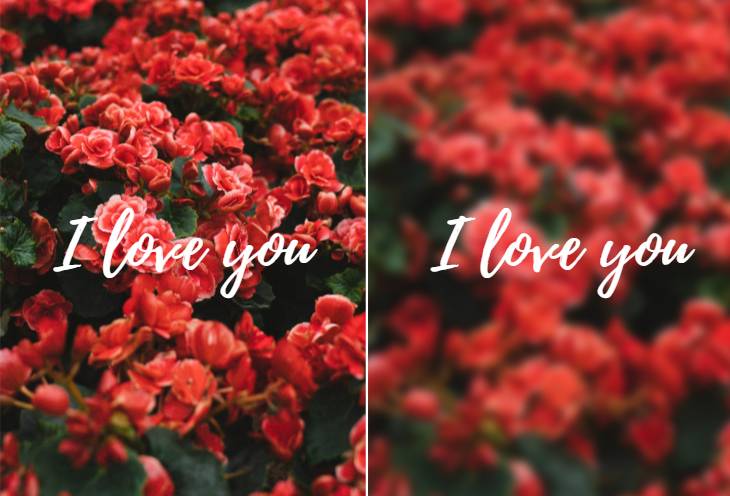
Highlight Text or Graphics
Blur the surrounding areas of text or graphic elements to make them stand out. Ideal for creating posters, invitations, or greeting cards.
Add Aesthetic Effect
Polish your images with artistic blur. Create a hazy atmosphere with Gaussian blur, add cinematic depth with the Bokeh effect, or introduce a dynamic touch with motion blur.
Avoid Copyright Infringement
Posting photos with visible brand logos can sometimes lead to copyright issues. Use our blur tool to mask logos, making your images safe for commercial use.
More Than an Image Blurrer
![Realistic icon]()
Censor Images
Concerned about privacy leaks? Try different types of pixelation and mosaic effects to easily censor image.
![diverse voice styles icon]()
Photo Effects
Fotor's all-in-one photo editor offers various photo effects, allowing you to further refine and stylize your blurred photos.